Showing posts with label Computer. Show all posts

Install Your Windows 7 through USB Flashdisk or Pendrive

This is how to make a bootable USB memory stick (Window 7 install) you will need at least one Windows 7 DVD and a blank 4gb USB or PENDRIVE.

1. Insert the Windows 7 DVD into your computer and the USB or PENDRIVE into your computer.

2. Open an “Command Prompt” and run “DISKPART”.

This will open a diskpart in separate window.


3. Type “LIST DISK” and take note what the disk number is of the USB or PENDRIVE. Check the SIZE column to know about your pendrive.

4. Then type “SELECT DISK Y” where Y is the disk number of the USB.

5. Type “CLEAN” ( This will clear all data from the USB or pendrive).

6. Type “CREATE PARTITION PRIMARY”.

7. Type “SELECT PARTITION 1”.

8. Type “ACTIVE”

9. Type “FORMAT FS=FAT32” and wait for 10 minutes or more depending upon the size of pendrive or usb.


10. Type “ASSIGN”.

11. The auto play window will now appears. Take note of the drive letter (e.g. G:\ ) and close this window.

12. Type “EXIT”.

13. At the command prompt type “xcopy E:*.* /s/e/f G:” where E is the drive letter of you DVD and G is the drive letter of your USB.

14. Now wait until it copy boot.wim and install.wim on to USB or PENDRIVE.

15. When xcopy is finished run “del G:\sources\ei.cfg” from the command prompt and your Windows 7 Bootable USB or PENDRIVE is ready for use. You can now either boot from the USB or just run setup.exe from the drive to start the install process. Done

Speed Up your PC

What Cause a Slow Computer?

Frankly, many aspects can affect the computer running speed and performance. To make it clear and logic, I will simply present you with some common computer errors and the main reasons related in most cases in the list below.

If the computer is clean from any virus infections, common computer issues and corresponding reasons are here to stay:

Retarding responding of the entire OS to your movements : Lack of disk space (This scenario can result from junk files, excessive unnecessary programs installed, too many tasks processing at the same time, comparatively low configuration of the computer.)

Sudden OS freezing : too many tasks processing at the same time

Occasional OS errors and slow OS running : bloated registry files or registry errors or incompatible programs installed

OS crashed : serious system errors in terms of either software or hardware

Programs unable for normal use : incompatibility or the program consuming overloading system resources

Black screen or blue screen : software errors or hardware errors

NOTE: Be aware that the above symptoms and corresponding reasons are based on that the computer is totally virus free since the overwhelming majority of computer infections will result in all the above issues in different infecting phase.

Therefore, to troubleshoot a slow computer, the first and foremost thing to do is to make sure the computer is clean from any virus/malware infections with a trusted virus/malware scanner.

Apart from virus scan, below are some emergency tips to speed up a slow PC with convenience.


How to Speed Up a Slow PC and Maintain a Well-performing OS

1.Restart the computer OS to get a fresh running state if the computer freezes.

2.Slim the OS. Check out if there are some unnecessary programs installed. If any, uninstall them. Also clean the files on the desktop and display the shortcuts as possible as you can.

3.Clean up the entire operating system. This usually includes throwing out junk files, repair registry errors, optimize system services and even trim apps. Of course, you can manually to do such all by removing temporary files/cache, fixing registry errors, optimizing Windows startup menu and shutdown process, and trimming apps of course. However, my suggestion is using a system cleaner to fulfill these all with efficiency since many computer experts have offered such convenience to us for now.

4.Upgrade the computer configuration. At any rate, you would not expect a computer with lower configuration running faster than a computer with higher configuration in normal cases. This would be unnatural. So considering this, one most efficient way to speed up a pc is to add a memory chip to enlarge the disk space, Local C disk space in particular.

By the way, the program unable to use or the OS crashed can be caused by incompatible software installation. So it is also always wise to ensure all software are compatible for smooth computer running.

To sum up, to troubleshoot a slow computer, make sure the computer is free from virus, spyware and other malware, ensure sufficient disk space for necessary tasks processing in a healthy slim OS environment. Furthermore, computer experts urge users to well maintain the computer OS with reliable security guards and system cleaner/optimizer.

These are tips how to fix A computer freezes at startup

The reasons that cause the computer freeze vary from malware infections, program conflicts with other programs and memory. In most case, a computer freezes randomly that you can just restart your operating system and the freeze problem is gone. But if you get the computer freeze problem at the same place, you have to manually troubleshooting the problem in Safe Mode.


1. Restart your computer into safe mode


to do this, please restart your computer and then press and hold F8 keys until you get Advanced Options menu screen. If the windows logo appears, you need to try again by waiting until the Windows logon prompt appears, and then shutting download and restarting your computer again. Use the arrow key to highlight Safe Mode, and then press Enter, your computer will boot automatically to safe mode.


2. Limit programs that run at Startup

A computer might freeze when startup if too many programs run with startup. Limiting programs that run at startup might help you to fix your computer freeze problem as well as improve the startup speed. To do this, please follow guide below:

1) Click on the Start button to launch the Start menu.
2) Type msconfig into the text box and then press Enter to locate msconfig; if you are using Windows XP, please click Run and then type msconfig to start msconfig. You will be prompted system configuration page as following.


3) Switch to Startup tab you will see the programs that run at the application level when Windows starts. Remove the check from the box next to programs that you do not want to start up with the operating system. And then confirm your settings by press Apply and OK button.


3. Uninstall programs which may cause your computer freezes

Think about if you have installed any new program before your get the computer freeze problem, especially beta program. If yes, please uninstall the program you installed recently to troubleshooting your problem. Some programs especially in beta version may conflict with other program that will cause the computer freeze at startup; it may also cause computer crashes or other similar problem.

1) Locate and open Programs and Features by clicking the Start button, clicking on Control panel--and then click "Uninstall a program" under "Programs" in you are under Control Panel View. If you are in Classic View, click on "Programs and Features".


2) Select a program to uninstall by clicking on it and then click "Uninstall" or "Uninstall/Change" depending on the program. You may need to enter your administrator password to continue your operating. After you press the Uninstall button, all program related file will be removed from your computer.


4. Scan with anti-virus or anti-malware program for the possible presence of virus infection


Launch your anti-virus or anti-malware program to perform a full scan. If you do not have one, you are highly encouraged to download and install anti-malware program Anvi Smart Defender free version to check for viruses.

Keyboard Shortcuts

There are plenty of useful key combinations for Computer Keyboard :

1. Add a Bookmark


Tab your new favorite website for easy access by bookmarking the page with the following quick trick.
PC: Ctrl + D
Mac: Apple key (see right) + D

2. Delete Forever
When you know you want to nix a file forever—instead of sending it to clog up the recycling bin first––tap the keys below.
PC: Shift + Delete

3. Close Browser
Whether your boss walks up while you're reading gossip blogs or your husband comes in the room while you're buying him a gift, close your browser, stat, with this shortcut.
PC: Alt + F4
Mac: Ctrl + Q

4. Show Desktop
If you have lots of windows open on your computer and you want quick access to your desktop—or a super-quick way to hide your work—hit the following keys.
PC: Window key (see right) + D
Mac: F11

5. Find Files or Folders
Forget painstakingly searching all of your folders to find one file. The shortcut below will do the searching for you.
PC: Window key + F
Mac: Apple key (see right) + F

6. Change Zoom Level
Whether you're working on the Web or in a word processing program, zoom in or out with this command.
PC: Ctrl + scroll mouse wheel
Mac: Apple key + plus sign; Apple key + minus sign

7. Reopen Previous Tab in Browser
Have you ever accidentally closed the browser tab you were looking at and had to spend time backtracking to find it again? The shortcut below will restore that page to you almost instantly.
PC: Ctrl + Shift + T
Mac: Apple key + Z

8. Switch Between Open Programs
Navigating between open screens can get confusing. Make it easy to move among all your programs with this quick trick.
PC: Alt + Tab
Mac: Apple key + Tab

9. Take a Screen Shot
Capture an image of what you're working on instantly with a screen grab—it's particularly useful for Web pages you can't copy and paste.
PC: Print Screen (then paste [Ctrl + V] into a Word document)
Mac: Apple key + Shift + 3

10. Refresh a Webpage
Whether you're waiting for a new email to arrive or the latest news story to pop up, easily refresh your screen using the keys below.
PC: F5, or Ctrl + R
Mac: Apple key + R

11. Go to a Previous Location in Browser
Time travel with the neat shortcut below, which lets you quickly go back to the webpage you were looking at before your current one.
PC: Alt + ←
Mac: Apple key + [

12. Spelling/Grammar Check
No more excuses: Perfect spelling and grammar is just one keystroke away.
PC or Mac: F7

13. Add "http://www" to Your Browser's Address Bar
The quickest route to your online destination? Just type in the name of the webpage you'd like to go to (for example, type "Google"), then press the following keys to add the "http://www." to the beginning and ".com" to the end.
PC: Ctrl + Enter
Mac: Apple key + Enter

14. Select the Address Bar
When you want to quickly type a new URL into your browser, the shortcut below will easily select the address bar for you, so you can start typing without moving your mouse.
PC: Ctrl + L, or F6
Mac: Apple key + L

15. Launch the Windows Start Menu
Just tap the keys below for an easy way to view your Start Menu options.
PC: Window key, or Ctrl + Esc

PC System Utilities Software

Advanced System Optimizer

Includes more than 30 tools for supercharging your PC's performance, and more than 200 tweaks for customizing Windows and improving its performance. New features include a spyware detective, an e-mail checker, an icon manager, a fast e-mailer, and a comprehensive backup tool for Outlook and for files and folders. You can back up the registry and restore it if it's damaged by a virus attack. The system cleaner removes junk and obsolete files from the system, including files often missed by the system uninstaller as well as by defrag and ScanDisk programs. The registry cleaner ensures that invalid information is removed, and the registry defragger helps you get maximum speed from your computer.
Latest version (www.systweak.com)

System Mechanic

Make your old PC run like new. Keep your new PC running fast and problem-free. System and registry clutter will degrade your computer's performance, leading to crashes, longer boot times, and system errors. System Mechanic combines over 40 powerful PC tuneup tools to clean hard drive clutter, repair your registry, defragment drives and memory, manage programs, boost your Internet connection, and remove spyware.
Latest version (www.iolo.com)


TuneUp Utilities Version

Enjoy Your PC fast, stable, customized. Have more fun--with your computer without all the hassles thanks to your new PC assistant. Work faster and get a better gaming experience. Now compatible with Windows 7.
Latest version (www.tune-up.com)


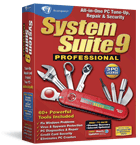
SystemSuite™ Professional

All-in-One Tune-Up, Repair, & PC Security Software
 * Detects & Removes Spyware & Viruses
 * Runs 100 tests to Diagnose & Fix Computer Problems
 * Make Credit Card transactions Securely Online
 * One-Step Tune-Up Wizards for Easy Maintenance
 * Eliminates PC Crashes, Freezes & Slowdowns
Latest Verison (www.avanquest.com)


Advanced SystemCare

Slow down, freeze, crash, and security threats are over. Advanced SystemCare Free is a comprehensive PC care utility that takes a one-click approach to help protect, repair, and optimize your computer. It provides an all-in-one and super convenient solution for PC maintenance and protection. All work will be done with 1 click and 1 minute. Compared with its nearest competitor, Advanced SystemCare Free provides the more essential and practical formula for Windows: Removing Spyware and Adware, Preventing Security Threats, Privacy Protection, Fixing Registry Errors, Temporary Files Cleanup, Startup Cleanup, Repairing Windows, Speeding up System and 1-click Mechanism.
Latest version (www.iobit.com)

Spotmau PowerSuite

This is a toolset for PC maintenance and optimization. This is also an emergency kit for rescuing and recovering your precious data and system. With this complete package, you can almost solve all your PC problems.
Latest version (www.spotmau.com)


PowerSuite

Your PC is a complex combination of advanced technologies which needs managing to get the best from it. Without regular updates, the drivers your PC uses to run all of its hardware, can become obsolete. Unless cleaned, your system’s registry will become disordered and bloated. And there are a whole range of other system changes, network boosts and disk cleanups which you need to run regularly, to keep your computer running optimally.
Latest version (www.liutilities.com)


Desktop Maestro

Is an all-in-one application that integrates registry cleaning, system monitoring and privacy cleaning. It combines the features of Registry Mechanic and Privacy Guardian to ensure that you have the range of tools at your fingertips to ensure optimal system performance, stability and user privacy. With Desktop Maestro, you can safely clean, repair, and optimize the Windows registry with a few simple mouse clicks. Problems with the Windows registry are a common cause of Windows crashes, slow performance and error messages. The Privacy Guardian feature of Desktop Mechanic guarantees your privacy by ensuring that all traces of your online and computer activities are permanently erased and unrecoverable on your PC. Desktop Maestro provides optimization and performance features that allow you to actively monitor system usage, processes, CPU, memory and disk space.
Latest version (www.pctools.com)

Norton Utilities™ Premier

* Speeds up PC boot time by prioritizing startup applications.
* Fixes common PC problems automatically — one-click is all it takes.
* Maximizes overall system performance to help make your old PC run like new again.
Latest version (www.symantec.com)


Ace Utilities

Is a set of system-maintenance and optimization utilities for enhancing Windows performance. Tools include Unneeded File Remover, for regaining valuable disk space, Registry Cleaner, for preventing application crashes, Startup Organizer, for preventing spy applications from running behind your back, History Eraser, for ensuring your privacy, Duplicate File Finder, for finding and removing duplicate files, Dead Shortcut Fixer, for fixing and removing shortcut and Start menu errors, Uninstaller Plus, for uninstalling applications correctly, Disk Analysis, for analyzing your hard disk, Secure Delete, for deleting files permanently, and Cookie and Plug-in managers, for erasing the history of more than 200 applications. Your computer will boot faster and run applications more smoothly. The program will help you delete your Internet cache, cookies, temp files, visited page history, and all other recent document info.
Latest version (www.acelogix.com)

Keyboard key combinations for ASCII code

American Standard Code for Information Exchange, or ASCII (American Standard Code for Information Interchange) is an international standard in a code of letters and symbols such as Hex and Unicode, but ASCII is more universal.
ASCII code is always used by computers and other communication tools to show the text.
ASCII code actually has a binary composition of 8 bits.
Starting from 00000000 through 11111111 (Biner Numeric).
The resulting combined total of 256, starting from code 0 to 255 in decimal number system.
Example: Press and hold down the ALT key on the keyboard and press the number 1 on the Numpad keyboard, then release the ALT key. This combination will produce ☺ character.
Here is a collection of ascii code that you can use by doing a combination of your keyboard keys.

alt + 1 = ☺
alt + 2 = ☻
alt + 3 = ♥
alt + 4 = ♦
alt + 5 = ♣
alt + 6 = ♠
alt + 7 = •
alt + 8 = ◘
alt + 9 = ○
alt + 10 = ◙
alt + 11 = ♂
alt + 12 = ♀
alt + 13 = ♪
alt + 14 = ♫
alt + 15 = ☼
alt + 16 = ►
alt + 17 = ◄
alt + 18 = ↕
alt + 19 =!
alt + 20 = ¶
alt + 21 = §
alt + 22 = ▬
alt + 23 = ↨
alt + 24 = ↑
alt + 25 = ↓
alt + 26 = →
alt + 27 = ←
alt + 28 = ∟
alt + 29 = ↔
alt + 30 = ▲
alt + 31 = ▼
alt + 32 = "space"
alt + 33 =!
alt + 34 = "
alt + 35 = #
alt + 36 = $
alt + 37 =%
alt + 38 = &
alt + 39 = '
alt + 40 = (
alt + 41 =)
alt + 42 = *
alt + 43 = +
alt + 44 =,
alt + 45 = --
alt + 46 =.
alt + 47 = /
alt + 48 = 0
alt + 49 = 1
alt + 50 = 2
alt + 51 = 3
alt + 52 = 4
alt + 53 = 5
alt + 54 = 6
alt + 55 = 7
alt + 56 = 8
alt + 57 = 9
alt + 58 =:
alt + 59 =;
alt + 60 = <
alt + 61 = =
alt + 62 =>
alt + 63 =?
alt + 64 = @
alt + 65 = A
alt + 66 = B
alt + 67 = C
alt + 68 = D
alt + 69 = E
alt + 70 = F
alt + 71 = G
alt + 72 = H
alt + 73 = £
alt + 74 = J
alt + 75 = K
alt + 76 = L
alt + 77 = M
alt + 78 = N
alt + 79 = O
alt + 80 = P
alt + 81 = Q
alt + 82 = R
alt + 83 = S
alt + 84 = T
alt + 85 = U
alt + 86 = V
alt + 87 = W
alt + 88 = X
alt + 89 = Y
alt + 90 = Z
alt + 91 = [
alt + 92 = \
alt + 93 =]
alt + 94 = ^
alt + 95 = _
alt + 96 = `
alt + 97 = a
alt + 98 = b
alt + 99 = c
alt + 100 = d
alt + 101 = e
alt + 102 = f
alt + 103 = g
alt + 104 = h
alt + 105 = i
alt + 106 = j
alt + 107 = k
alt + 108 = l
alt + 109 = m
alt + 110 = n
alt + 111 = o
alt + 112 = p
alt + 113 = q
alt + 114 = r
alt + 115 = s
alt + 116 = t
alt + 117 = u
alt + 118 = v
alt + 119 = w
alt + 120 = x
alt + 121 = y
alt + 122 = z
alt + 123 = (
alt + 124 = |
alt + 125 =)
alt + 126 = ~
alt + 127 = ⌂
alt + 128 = Ç
alt + 129 = ü
alt + 130 = é
alt + 131 = â
alt + 132 = ä
alt + 133 = à
alt + 134 = å
alt + 135 = ç
alt + 136 = ê
alt + 137 = ë
alt + 138 = è
alt + 139 = ï
alt + 140 = î
alt + 141 = ì
alt + 142 = Ä
alt + 143 = Å
alt + 144 = É
alt + 145 = æ
alt + 146 = Æ
alt + 147 = ô
alt + 148 = ö
alt + 149 = ò
alt + 150 = û
alt + 151 = ù
alt + 152 = ÿ
alt + 153 = Ö
alt + 154 = Ü
alt + 155 = ¢
alt + 156 = £
alt + 157 = ¥
alt + 158 = ₧
alt + 159 = ƒ
alt + 160 = á
alt + 161 = í
alt + 162 = ó
alt + 163 = ú
alt + 164 = ñ
alt + 165 = Ñ
alt + 166 = ª
alt + 167 = º
alt + 168 = ¿
alt + 169 = ⌐
alt + 170 = ¬
alt + 171 = ½
alt + 172 = ¼
alt + 173 = ¡
alt + 174 = «
alt + 175 = »
alt + 176 = ░
alt + 177 = ▒
alt + 178 = ▓
alt + 179 = │
alt + 180 = ┤
alt + 181 = ╡
alt + 182 = ╢
alt + 183 = ╖
alt + 184 = ╕
alt + 185 = ╣
alt + 186 = ║
alt + 187 = ╗
alt + 188 = ╝
alt + 189 = ╜
alt + 190 = ╛
alt + 191 = ┐
alt + 192 = └
alt + 193 = ┴
alt + 194 = ┬
alt + 195 = ├
alt + 196 = ─
alt + 197 = ┼
alt + 198 = ╞
alt + 199 = ╟
alt + 200 = ╚
alt + 201 = ╔
alt + 202 = ╩
alt + 203 = ╦
alt + 204 = ╠
alt + 205 = ═
alt + 206 = ╬
alt + 207 = ╧
alt + 208 = ╨
alt + 209 = ╤
alt + 210 = ╥
alt + 211 = ╙
alt + 212 = ╘
alt + 213 = ╒
alt + 214 = ╓
alt + 215 = ╫
alt + 216 = ╪
alt + 217 = ┘
alt + 218 = ┌
alt + 219 = █
alt + 220 = ▄
alt + 221 = ▌
alt + 222 = ▐
alt + 223 = ▀
alt + 224 = α
alt + 225 = ß
alt + 226 = Γ
alt + 227 = π
alt + 228 = Σ
alt + 229 = σ
alt + 230 = μ
alt + 231 = τ
alt + 232 = Φ
alt + 233 = Θ
alt + 234 = Ω
alt + 235 = δ
alt + 236 = ∞
alt + 237 = φ
alt + 238 = ε
alt + 239 = ∩
alt + 240 = ≡
alt + 241 = ±
alt + 242 = ≥
alt + 243 = ≤
alt + 244 = ⌠
alt + 245 = ⌡
alt + 246 = ÷
alt + 247 = ≈
alt + 248 = °
alt + 249 = ∙
alt + 250 = ·
alt + 251 = √
alt + 252 = ⁿ
alt + 253 = ²
alt + 254 = ■
alt + 255 = "space"

Keyboard Shortcuts for Macintosh

Here's a collection of keyboard shortcuts for macintosh that might be useful for you macintosh users:

Startup :
Press X during startup -> Force Mac OS X startup
Press Option-Command-Shift-Delete during startup -> Bypass primary startup volume and seek a different startup volume (such as a CD or external disk)
Press C during startup -> Start up from a CD that has a system folder
Press N during startup -> Attempt to start up from a compatible network server (netboot)
Press T during startup -> Start up in FireWire Target Disk mode
Press Shift during startup -> start up in Safe Boot mode and temporarily disable login items and non-essential kernel extension files (Mac OS X 10.2 and later)
Press Command-V during startup -> Start up in Verbose mode.
Press Command-S during startup -> Start up in Single-User mode

Finder window :
Command-W -> Close Window
Option-Command-W -> Close all Windows
Command-Right Arrow -> Expand folder (list view)
Option-Command-Right Arrow -> Expand folder and nested subfolders (list view)
Command-Left Arrow -> Collapse Folder (list view)
Option-Command-Up Arrow -> Open parent folder and close current window

Menu commands :
Shift-Command-Q -> Apple Menu Log out
Shift-Option-Command-Q -> Apple Menu Log out immediately
Shift-Command-Delete -> Finder Menu Empty Trash
Option-Command-Shift-Delete -> Finder Menu Empty Trash without dialog
Command-H -> Finder Menu Hide Finder
Option-Command-H -> Finder Menu Hide Others
Command-N -> File Menu New Finder window
Shift-Command-N -> File Menu New Folder
Command-O -> File Menu Open
Command-S -> File Menu Save
Shift-Command-S -> File Menu Save as
Command-P -> File Menu Print
Command-W -> File Menu Close Window
Option-Command-W -> File Menu Close all Windows
Command-I -> File Menu Get Info
Option-Command-I -> File Menu Show Attributes Inspector
Command-D -> File Menu Duplicate
Command-L -> File Menu Make Alias
Command-R -> File Menu Show original
Command-T -> File Menu Add to Favorites
Command-Delete -> File Menu Move to Trash
Command-E -> File Menu Eject
Command-F -> File Menu Find
Command-Z -> Edit Menu Undo
Command-X -> Edit Menu Cut
Command-C -> Edit Menu Copy
Command-V -> Edit Menu Paste
Command-A -> Edit Menu Select All
Command-1 -> View Menu View as Icons
Command-2 -> View Menu View as List
Command-3 -> View Menu View as Columns
Command-B -> View Menu Hide Toolbar
Command-J -> View Menu Show View Options
Command - [-> Go Menu Back
Command -] -> Go Menu Forward
Shift-Command-C -> Go Menu Computer
Shift-Command-H -> Go Menu Home
Shift-Command-I -> Go Menu iDisk
Shift-Command-A -> Go Menu Applications
Shift-Command-F -> Go Menu Favorites
Shift-Command-G -> Go Menu Goto Folder
Command-K -> Go Menu Connect to Server
Command-M -> Window Menu Minimize Window
Option-Command-M -> Window Menu Minimize All Windows
Command-? -> Help Menu Open Mac Help
Command-Space -> Open Spotlight (Mac OS X 10.4 or later)
Command-ESC -> activates Front Row Front Row for certain Apple computers

Universal Access and Voiceover :
Option-Command-8 -> Turn on Zoom
Option-Command-+ (plus) -> Zoom in
Option-Command-(minus) -> Zoom out
Control-Option-Command-8 -> Switch to White on Black
Control-F1 -> Turn on Full Keyboard Access
When Full Keyboard Access is turned on, you can use the key combinations listed in the table below from the Finder.
Control-F2 -> Full Keyboard Access Highlight Menu
Control-F3 -> Full Keyboard Access Highlight Dock
Control-F4 -> Full Keyboard Access Highlight Window (active) or next window behind it
Control-F5 -> Full Keyboard Access Highlight Toolbar
Control-F6 -> Full Keyboard Access Highlight Utility window (palette)
Command-F5 or fn-Command-F5 -> Turn Voiceover on or off (Mac OS X 10.4 or later)
Control-Option-F8 or fn-Control-Option-F8 -> Open Voiceover Utility (Mac OS X 10.4 or later)
Control-Option-F7 or fn-Control-option-F7 -> Display Voiceover menu (Mac OS X 10.4 or later)
Control-Option-; or fn-Control-option-; -> Enable / disable voiceover lock Control-Option (Mac OS X 10.4 or later)

Mouse Keys :
8 -> Move Up
2 -> Move Down
4 -> Move Left
6 -> Move Right
1, 3, 7, and 9 -> Move diagonally
5 -> Press Mouse Button
0 -> Hold Mouse Button
. (period on keypad) -> Release Mouse Button (use after pressing 0)

Other Commands :
Option-Command-D -> Show / Hide Dock
Command-Tab -> Switch application
tab -> Highlight next item
Command-Up Arrow -> Move up one directory
Command-Down Arrow -> Move down one directory
Page Up or Control-Up Arrow -> Move up one page
Page Down or Control-Down Arrow -> Move down one page
Option-Drag -> Copy to new location
Option-Command-Drag -> Make alias in new location
Command-Drag -> Move to new location without copying
Shift-Command-C -> Show Colors palette in application
Command-T -> Show Font palette in application
Command-Shift-3 -> Take a picture of the screen
Command-Shift-4 -> Take a picture of the selection
Command-Shift-4, then press Control while selecting -> Take a picture of the screen, place in Clipboard
Command-Shift-4, then Spacebar -> Take a picture of the selected window
Option-Command-ESC -> Force Quit
Control-Eject -> Restart, Sleep, Shutdown dialog box
Control-Command-Eject -> Quit all applications and restart
Option-Command-Eject or Option-Command-Power -> Sleep
Command-click window toolbar button (upper right corner) -> Cycle through available views for the window's toolbar (dependent on the nature of the Finder or application window)
Command-`-> Cycle through windows in application or Finder (if more than one window is open)
Function-Delete (only Portables, PowerBook, iBook, MacBook, MacBook Pro) -> Forward Delete (delete the character to the right of your cursor)

Accelerating Shutdown Process In Windows

Here are some techniques that can be used to speed up your windows shutdown process that is by modifying several registry on your windows.

1. Used to close all applications during shutdown (auto kill).
- Log into your registry editor (Start -> Run -> Type regedit)
- Go to the following registry
HKEY_CURRENT_USER \ Control Panel \ Desktop
- Find a key with the name "AutoEndTasks" key and right click it and select Modify, change the Value data to 1.

2. Used to change the time to close an application if an application is Hang.
- Log into your registry editor (Start -> Run -> Type regedit)
- Go to the following registry
HKEY_CURRENT_USER \ Control Panel \ Desktop
- Find a key with the name "WaitToKillAppTimeout" and "HungAppTimeout".
- Right-click each key and select Modify and change the Value Data to 1000.

3. Used to disable the Paging File Clearing facility.
Before using this step you can see what purpose here http://en.wikipedia.org/wiki/Paging_file paging file.
- Log into your registry editor (Start -> Run -> Type regedit)
- Go to the following registry
HKEY_LOCAL_MACHINE \ SYSTEM \ CurrentControlSet \ Control \ SessionManager \ Memory Management
- Find a key with the name "ClearPageFileOnShutdown".
- Right-click the key and select Modify and change the Value Data to 0 if the Value Data not equal to 0.

Useful Applications For Linux

Applications are mostly under the Open Source applications and can be downloaded for free.

OpenOffice
OpenOffice is a multi-platform products for the office.
Inside there is a desktop application like a word processor, spreadsheet, presentation manager and drawing program with user interface and other features similar to other office programs.
Download (http://openoffice.mirrors.tds.net/pub/openoffice/stable/3.0.1/)

Calm Antivirus
Clam AntiVirus is an open source application (GPL) anti-virus toolkit for UNIX, designed for e-mail scanning on mail gateways on.
Clam AntiVirus provides a number of utilities including a flexible, scalable multi-threaded daemon, a command line scanner, and can update the database automatically.
Download (http://www.clamav.net/download/)

FileZilla
FileZilla is a free application solutions for FTP.
FileZilla client is an application for fast and reliable cross-platform FTP, FTPS and SFTP client with many useful features with an intuitive graphical user interface.
Download Client (http://filezilla-project.org/download.php?type=client)
Download Server (http://filezilla-project.org/download.php?type=server)

GZIP
gzip (GNU zip) is a utility for compression.
Benefits GZIP is a better compression and freedom from patented algorithms.
It has been adopted by the GNU project and is now quite popular on the Internet.
Download (http://www.gzip.org/)

PuTTY
PuTTY is a free implementation of the application for Telnet and SSH.
Putty can be used in Win32 operating systems and Unix platforms.
Download (http://www.chiark.greenend.org.uk/)

OpenSSH
OpenSSH is a FREE version of the SSH connectivity tools.
Users telnet, rlogin, and ftp may not realize that their password is transmitted on the Internet without encryption.
But OpenSSH encrypts all doing traffic (including passwords) to effectively prevent eavesdropping, connection hijacking and other attacks.
Additionally, OpenSSH provides secure tunneling capabilities and several authentication methods, and supports all SSH protocol versions.
Download (http://www.openssh.org/portable.html)

Conky
Conky is a free application, Conky can display any information on your computer.
Conky facility include:
* Displays info such statistics as:
uname, uptime, CPU usage, mempry usage, disk usage, process and monitor network statistics.
* Support for POP3 and IMAP.
* Support a lot of music players such as MPD, XMMS2, BMPx, audacious and more.
Conky can display information either as text, a simple process and a graph widget with colors and different fonts.
Download (http://sourceforge.net/project/showfiles.php?group_id=143975&package_id=158249)

Truecrypt
Truecrypt is an application of open source encryption for Windows Vista / XP, Mac OS X, and Linux
Truecrypt uses include:
* Create a virtual encrypted disk within a file and mounts as a real disk.
* Do encryption partitions or storage devices like USB flash drives and hard drives.
* Conducting drive encryption or partition where Windows is installed (pre-boot authentication).
* Make Encryption is automatic, real-time (on-the-fly) and transparent.
* Provides two levels of plausible deniability, if an enemy force that expresses a password:
* Using algorithms: AES-256, Serpent, aTwofish and modes of operation: XTS.
Download (http://www.truecrypt.org/downloads.php)

FireStarter
Firestarter is a Real Time firewall that monitors all the ports are open and active on the network connection on your computer.
Allows you to set very strict rules set.
The main features include
* Open Source and available for free.
* Easy to use graphical interface.
* Suitable for use in desktops, servers and gateways.
* Allows you to manage inbound and outbound rules.
* Can see network activity including traffic through the firewall.
Download (http://www.fs-security.com/download.php)

GParted
GParted is the Gnome Partition Editor application.
GParted is an application to create, delete, resize, move, examine, copy partitions and file systems.
GParted can make space for new operating systems, reorganizing disk usage, copying data residing on hard disks and mirroring one partition with another.
Download (http://gparted.sourceforge.net/download.php)

Speed Up Your Computer Performance

Here some tips to reduce the burden of your computer's performance.

- Step 1
The first step to accelerate the boot via the BIOS.

- Step 2
For Windows XP, start by opening the System Configuration Utility. (Start-> Run-> type "msconfig").
On the BOOT.INI tab, check the "/ NOGUIBOOT", this will shorten boot time by removing the Windows startup screen.
On the Startup tab, remove the check mark the services that really are not needed.
On the service tab to do the same thing as in the Startup tab.

- Step 3
This setting can you do if you are interested in the speed of Windows XP from the graphics or the appearance of Windows XP.
Setting this interface can be re-accelerated.
Go to Control Panel and click System, then select the Advanced tab.
Performance options click on Settings, then the Visual Effects tab select "Adjust for Best Performance".

- Step 4
Do not use wallpaper and minimization of the number of desktop icon can also speed up your PC.

- Step 5
Do not use voice on Windows Start event can also speed up the boot process.
Go to Control Panel and click on "Sounds and Audio Devices" and select the Sounds tab.
At Sound scheme select No Sounds.

- Step 6
Reduce the number of fonts that are not so important in your Windows.
because the more the number of installed fonts will add a heavy workload on your PC.
Windows by default, includes a number of less than 100 fonts.
Keep the number of fonts installed not more than 150 fonts.

- Step 7
You must be diligent to update the driver, because the files are still using the old drivers can slow down your PC.

Changing the Display System Properties Windows XP

 You can change the information of the System Properties by following the steps as follows:

System Properties-> System Properties

1. Create a file with the name oeminfo.ini with the following contents:
[Support Information]
Line1 = Type your info here
Line2 = Type your info here
Line3 = Type your info here
Line4 = Type your info here
Line5 = Type your info here

[general]
Manufacturer = Created by Finderonly
Model = Model Finderonly 1.0

2. Save the file to the directory oeminfo.ini C: \ WINDOWS \ system32 \

3. Chose a picture (*. bmp extention with the resolution is not too big) you want to display the System Properties and give the name and save it to oemlogo.bmp directory C: \ WINDOWS \ system32 \

4. Now you can see the changes.

Hopefully Helpful

Basic Command For Linux

There are some commands for Linux :


cat
Example: $ cat filename
Function: Displays the contents of a file on the screen.

cd
Function: Used to move the directory as cd in windows functionality.

chmod
Example: $ chmod 777 filename / directory name
Function: Used to add and subtract users permission to access files or directories.

chown
Function: Used to change owner of a file or directory.

cp
Example: $ cp
To copy a file or copy. For example to copy file1 to file2.

find
Example: $ find. -name *. doc-print
Function: To find the location of a file.

grep
Example: $ grep
Function: Used to search for files containing text with the criteria you have set

gzip
Example: $ gzip
Function: Used to compress a file

kill
Example: $ kill
Function: Used to stop the process running.

ls
Function: Used to display the contents of a directory like dir command in windows.

lsmod
Function: Used to view the modules there

rmmod
Function: Used to remove the modules have

mkdir
Example: $ mkdir
Function: Used to Create a new directory as the DOS md command.

mv
Function: Used to move files from one location to another.

pwd
Function: Used to display the name of the directory where you at that time was.

passwd
Function: Used to change the root password.

ps aux
Function: Used to look at the processes running.

rm
Function: Used to delete a file, but by default rm command does not remove directories.

rmdir
Function: Used to delete an empty directory.

rpm
Function: Used to install rpm files

su
Function: Used to temporarily login as another user.

start
Function: A command to run the service.

stop
Function: A command to stop the service.

shutdown
Function: A command to turn off the system.

tar
Example: $ tar or direktori>
Function: Save and extract the files from media such as tape drives or hard disk.

unzip
Example: $ unzip
Function: Used to describe the extract or compress files with zip.

who
Function: Used to show anyone who was logged.

Command Prompt Commands For Computer Networks.

Here are the commands in the Command Prompt related to computer networks.
To perform these commands you must enter the Command Prompt (Click Start -> Run -> Type CMD)

ipconfig / all
Displays the connection configuration information, such as Host Name, Primary DNS Type, Ethernet LAN Adapter.

ipconfig / flushdns
Removing DNS Cache

ipconfig / release
"Removing" all connections IP Address.

ipconfig / renew
Creating a new IP address for a particular adapter.

ipconfig / displaydns
Displaying DNS Cache.

ipconfig / registerdns
To refresh control and re-connection control register.

ipconfig / showclassid
Displays information DHCP Class.

ipconfig / setclassid
Changing DHCP Class ID

netconnections control
Displaying Network Connection.

nslookup
Knowing the IP address in the address of the domain name in the list

netstat
Displays information TCP / IP is currently active.

route
Displays local route.

hostname
Displays the name of the computer.

ping
Example: ping www.lyricspluschords.blogspot.com
Test www.lyricspluschords.blogspot.com connection to the site.
The less% loss was the better connections.

tracert
IP Address Displays route information.

The characteristics of virus infected computer.

Here's one of the characteristics of virus infected computer:

1. Your computer runs slower than usual.
2. Menu Run, Search hidden by the virus.
3. CTRL + ALT + DEL can not be used.
4. MSCONFIG in regedit and disabled
5. Original folders on your computer hidden and replaced with virus files.
6. Menu Tools -> Folder Options in Windows Explorer is missing.
7. Computers often stopped or not responding.
8. Computer suddenly restart or crash, and this happened a few minutes.
9. Computer applications are not running properly and often error.
10. Files with the icon appears but has a file folder type. Exe
11. Hard drive or disk drive can not be accessed.
12. Print activity does not work properly.
13. It often happens that strange error messages and do not usually.
14. Often seen the menu or dialog box is damaged.
15. There is duplication of names in a folder in the folder.
16. Computers always took the message from which the virus originated.

If your computer has one of the above characteristics, there is likely a virus on your computer, immediately update your antivirus and scan your computer to clean the virus.

Secrets Applications In Windows XP

To run the applications below:
Open a command prompt and Type in the name of the program (example: cleanmgr.exe) or click Start -> Run and Type in the name of the program (example: cleanmgr.exe).

Disk Cleanup = cleanmgr.exe
Used to cleanup disk

Character Map = charmap.exe
Used to find characters that are not common

Dr Watson = drwtsn32.exe
Used for troubleshooting on the PC.

DirectX diagnosis = dxdiag.exe
Used for the diagnosis audio video card

Private character editor = eudcedit.exe
Used to create a new character in your windows

IExpress Wizard = iexpress.exe
Used to create self-extracting / self-installing package. such as Zip files

Microsoft Synchronization Manager = mobsync.exe
Used to make sincronisasi.

Clipboard Viewer = clipbrd.exe
Used to view the content of the Windows clipboard

Windows Media Player 5.1 = mplay32.exe
Used to open Windows Media Player version 5.1

ODBC Data Source Administrator = odbcad32.exe
Used for database

Object Packager = packager.exe
Used to insert the object into a file.

System Configuration Editor = sysedit.exe
Used to change the System.ini and WIN.INI

Syskey = syskey.exe
Used to configure an account in windows.

Microsoft Telnet Client = telnet.exe
Used to connect the internet before there was a browser.

Driver Verifier Manager = verifier.exe
Used for monitoring drivers in your windows

Windows for Workgroups Chat = winchat.exe
Used to chat sec

System configuration = msconfig.exe
Used to control the startup programs

System Monitor = perfmon.exe
Used to monitor your PC.

Program Manager = progman.exe
A legacy from the Windows 3.x desktop shell

gpedit.msc
Used to set the group policy and the authorization, if you use Active Directory.

Remote Access phone book = rasphone.exe
An application such as a phone book

Registry Editor = regedt32.exe [also regedit.exe]
Used for tweaking and editing windows registry

Network shared folder wizard = shrpubw.exe
Used to create shared folders in network

Siganture file verification tool = sigverif.exe
Used for signature verification

Volume Control = sndvol32.exe
Used to display the sound control in the System Tray

Computer Virus How And it Works


The following types of viruses and how each of the virus:

Virus Files
This virus has infected the workings of the application or document in your computer.
When an infected application is run, the virus will spread in a way to infect all files or documents accessed by the application.

Boot Sector Virus
This virus has infected the workings of the hard disk boot sector (boot sector is an area in the first hard drive when the computer is turned on accessible).
If the boot sector virus is active, users will not be booting the computer normally.

E-mail Virus
This virus has a way of working that is spread via e-mail (usually in the form of an attachment file attachment).
The virus has a special feature of the extension. Scr,. Exe,. Pif, or. Bat.
If the virus is active, then he would send himself to the various e-mail addresses contained in the user's address book.

Multipartite Virus
This virus has a way of working that infects computer files and boot sector on the hard disk.
This type of virus will cause many problems since they cause fatal damage.

Virus Polimorfis
This virus has a unique way of working is the virus may change the code itself (change form) while spreading itself to other computers
The virus type is more difficult to detect because it has such properties ..

Stealth Virus
This virus has a way of working that he was able to hide themselves by making an infected file as if the file is not infected.

Macro Virus
This virus has infected the workings of Microsoft Office applications like Word and Excel.
Documents are usually infected by a macro virus will modify the existing command in Microsoft Office such as the "Save" to spread itself when the command is executed.

Know Error Blue Screen In Windows

IRQL_NOT_LESS_OR_EQUAL (0X0000000A)
This error most often appears in the event of Blue Screen.
This error message is usually caused by a mismatch because they have installed the drivers on your computer.
Causes:
- Drivers who clashed or unsuitable
- Problems in the Video Card, this includes the video card overclock you exceed the limit or just changed your video card and drivers do not uninstall the old video card from a different chipset
- Problems in Audio Cards, including configuration errors or bugs in the sound card drivers

NTFS_FILE_SYSTEM or FAT_FILE_SYSTEM (0X00000024) or (0X00000023)
This error message at least give a little where the damage was, which is in the partition or filesystem but not on the hard drive.
We can check by examining the SATA or PATA cable or can check the partition with chkdsk tool.

UNEXPECTED_KERNEL_MODE_TRAP (0X0000007F)
When you get this error message, can be caused by:
- Excessive Hardware Overclock
- Components of an overheated computer
- BIOS is corrupt
- Memory and CPU is disabled

DATA_BUS_ERROR
This error message is caused because of the possibility that memory or the memory slot on the motherboard is damaged.

PAGE_FAULT_IN_NONPAGED_AREA
This error message is caused because of the damage to hardware, including main memory, video card memory, or memory in the processor (L2 Cache)

INACCESSIBLE_BOOT_DEVICE
This error message is caused because of an error in the configuration jumpers wrong disk, boot sector viruses, the IDE controller driver is wrong, or the chipset driver error.

VIDEO_DRIVER_INIT_FAILURE
This error message due to installation error occurred on the video card drivers are not perfect restart during installation or can also occur because of errors in the driver installation.

BAD_POOL_CALLER
This error message is caused because of this error can occur because of errors or incompatible drivers. Often occurs during the installation of XP from an upgrade, or not from the new installation.

PEN_LIST_CORRUPT
This error message is caused because of the damage RAM

MACHINE_CHECK_EXCEPTION
This error message is caused by a defective CPU, or that the overclock aggressively, and power supply shortages or damaged resources.

Speed Up Booting Time Windows XP

Here are the steps to boot your windows faster:

Step 1 :
Open the notepad application
Type "del c: \ windows \ prefetch \ ntosboot-*.* / q" (without the quotes)
and save as ntosboot.bat name in drive c: \

Step 2 :
Then click the Start menu-> Run-> and type gpedit.msc

Step 3 :
Click Computer Configuration-> Windows Settings-> Scripts-> then click 2 times on Shutdown

Step 4 :
In Windows Shutdown Properties and then click add browse. and search for the location of the file that you created ntosboot.bat earlier and click open

Step 5:
Then click OK, Apply and OK again to finish

Step 6 :
Then click the Start menu-> Run-> devmgmt.msc and

Step 7 :
Click IDE ATA / ATAPI controllers-> Primary IDE Channel (click 2 times to open the Properties)

Step 8 :
Select Advanced Settings
In Device 0 or Device 1
Change the Device Type to None (Change Device Type only option that is not locked)

Step 9 :
Click IDE ATA / ATAPI controllers-> Secondary IDE Channel (click 2 times to open the Properties)
Repeat as Step 8

Step 10 :
Restart your computer and you can see the changes.

Hopefully Helpful

Repair Windows XP Without Reinstall

Correcting Installation (Repair Install)

If your Windows XP damaged (corrupted) where you do not have another operating system to boot,
You can do the repair installation (Repair Install) who works as setting (settings)
the beginning.

- Make sure you have the key (key) Windows XP is valid.
- The entire process will take less than 1 / 2 or 1 hour, depending on your computer spec.
- If you asked for an administrator password, you should select the repair option (repair) the second,
not the first.
- Insert your Windows XP CD and do the boot from the CD.
- When it comes second repair option R = Repair, press the R
This will start the repair.
- Press the F8 key to agree the next process "I Agree at the Licensing Agreement"
- Press the R button when the directory where you installed Windows XP. Usually C: \ WINDOWS
Next will be checked drive C: and start copying files.
And automatically restart if needed. Let your CD in the drive.
- Next you will see a picture of "progress bar" which is part of the improvement,
he looks like a normal XP installation normally, including "Collecting Information, Dynamic Update,
Preparing Installation, Installing Windows, Finalizing Installation ".
- When asked, click the Next button
- When asked to enter a keyword, enter the key (key) Windows XP valid.
- Normally you want to remain in the Domain or Workgroup name the same.
- The computer will restart.
- Then you will have the same screen as the activation of the system as a normal installation.
- Register if you want it (usually not necessary).
- Done

Now you can log in with your account that already exists.


NTOSKRNL Damaged or Missing (Missing or Corrupt)

If you find an error message that "NTOSKRNL not found" / NTOSKRNL not found, do:
- Insert the Windows XP CD and booting from the CD.
- At the time appeared R = Repair option first, press the R.
- Press the number according to the location of the Windows installation you want repaired as appropriate.
- Usually # 1
- Change to the CD Drive you are.
- Type: CD i386
- Type: ntkrnlmp.ex_ expand C: \ Windows \ System32 \ Ntoskrnl.exe
- If Windows XP is installed elsewhere, change according to location.
- Remove your CD and type EXIT


HAL.DLL Damaged or Missing (Missing or Corrupt)

If you get errors related to corrupted or missing hal.dll file, it is possible
BOOT.INI file has the wrong configuration (misconfigured).

- Insert the Windows XP CD and booting from the CD.
- At the time appeared R = Repair option first, press the R.
- Press the number according to the location of the Windows installation you want repaired as appropriate.
- Usually # 1
- Type: bootcfg / list
Displays the contents of / feedback on the current BOOT.INI file
- Type: bootcfg / rebuild
Improve the configuration of the BOOT.INI file
- Remove your CD and type EXIT


Directory \ WINDOWS \ SYSTEM32 \ CONFIG damaged or lost

If you get an error with the words:

"Windows could not start because the following files is missing or corrupted
\ WINDOWS \ SYSTEM32 \ CONFIG \ SYSTEM or \ WINDOWS \ SYSTEM32 \ CONFIG \ SOFTWARE "

- Insert the Windows XP CD and booting from the CD.
- At the time appeared R = Repair option first, press the R.
- Press the number according to the location of the Windows installation you want repaired as appropriate.
- Usually # 1
- Enter the administrator password if required.
- Type: cd \ windows \ system32 \ config
- Next depending on the location of the damage:
- Type: ren ren software system software.rusak OR system.rusak
- Next again also depends on the location of the damage:
- Type: copy \ windows \ repair \ system
- Type: copy \ windows \ repair \ software
- Remove your CD and type EXIT


NTLDR or NTDETECT.COM not found (NTLDR or NTDETECT.COM Not Found)

If you find an error that NTLDR not found when booting:

For the type of FAT partition
Take your boot from your Win98 floppy and copy the files NTLDR or NTDETECT.COM
from the i386 directory to the drive stem (root) C: \

For the type of NTFS partition
- Insert the Windows XP CD and booting from the CD.
- At the time appeared R = Repair option first, press the R.
- Press the number according to the location of the Windows installation you want repaired as appropriate.
- Usually # 1
- Enter the administrator password if required.
- Enter the following command, where X: is the address of the CD ROM drive you (Customize!).
- Type: COPY X: \ i386 \ NTLDR C: \
- Type: COPY X: \ i386 \ NTDETECT.COM C: \
- Remove your CD and type EXIT

Move The Cursor Without Mouse

Windows has a built in tool called "MouseKeys" that allows you to control the pointer with the numeric keypad on your keyboard.

To enable MouseKeys, you can go to Control Panel > Accessibility Options > Mouse tab and check Use MouseKeys. Another way to enable MouseKeys is by simultaneously pressing the “left ALT + left SHIFT + NUM LOCK” keys. Take note that it only works if you press the left side ALT and SHIFT. If you use the right side, it wouldn’t work. When MouseKeys is enabled, you can temporary disable it by pressing the Num Lock key.

Here are the keys used by Mousekeys to navigate your cursor :

2 = Move Down
8 = Move Up
4 = Move Left
6 = Move Right
7 = Move Diagonally Top Left
9 = Move Diagonally Top Right
1 = Move Diagonally Bottom Left
3 = Move Diagonally Bottom Right
5 = Simulate Mouse Single Left Click
(+) = Simulate Mouse Double Click
(-) = Simulate Mouse Right Click
(*) = Simulate Both Mouse Buttons Click At Once

By default, the cursor will move really slow. You’ll have to go to Settings and adjust both the top speed and acceleration to the highest. To set the maximum speed at which the mouse pointer moves when you hold down a MouseKeys direction key, under Pointer speed, drag the Top speed slider. To set how quickly the mouse pointer accelerates to its maximum speed when you hold down a MouseKeys direction key, under Pointer speed, drag the Acceleration slider.